Introduction
Methods
Part I: Create a New Project in eCognition Developer
In the first part of this lab, the goal was to, as the name implies, create a new project in eCognition Developer. The first step after opening the software was to bring in an image of the greater Eau Claire area and change the spectral band combination to reflect a false color image instead of the default color combination.
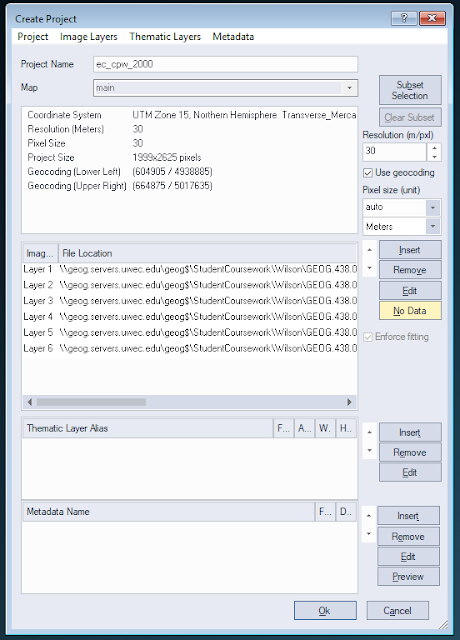 |
| Figure 1: Creating a new project and importing the image. |
 |
| Figure 2: Changing the spectral band combination to reflect a false color image. |
Part II: Segmentation and Sample Collection
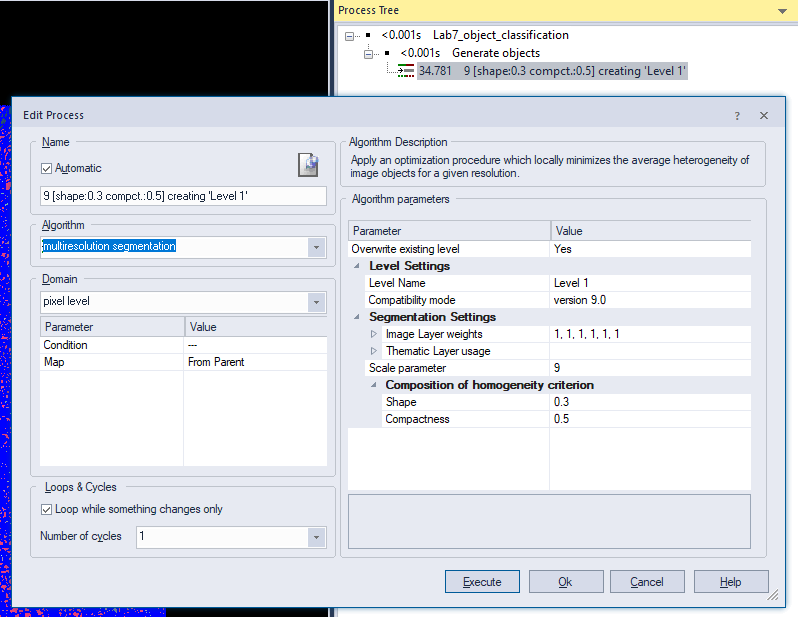
Next, the
Process Tree function in eCognition was used to generate polygons that segmented the image. This was done by appending a new process to the window (
Lab7_object_classification in Figure 4), inserting a child process (
generate objects in Figure 4), and inserting another child process (
Level 1 in Figure 4). The polygons for 'Level 1' were generated (Figure 5) after the settings for the process were established (Figure 4).
 |
| Figure 3: Opening a Process Tree Dialogue Window. |
 |
| Figure 4: Branches of process tree shown in upper right, settings for 'Level 1' process shown in Edit Process window. |
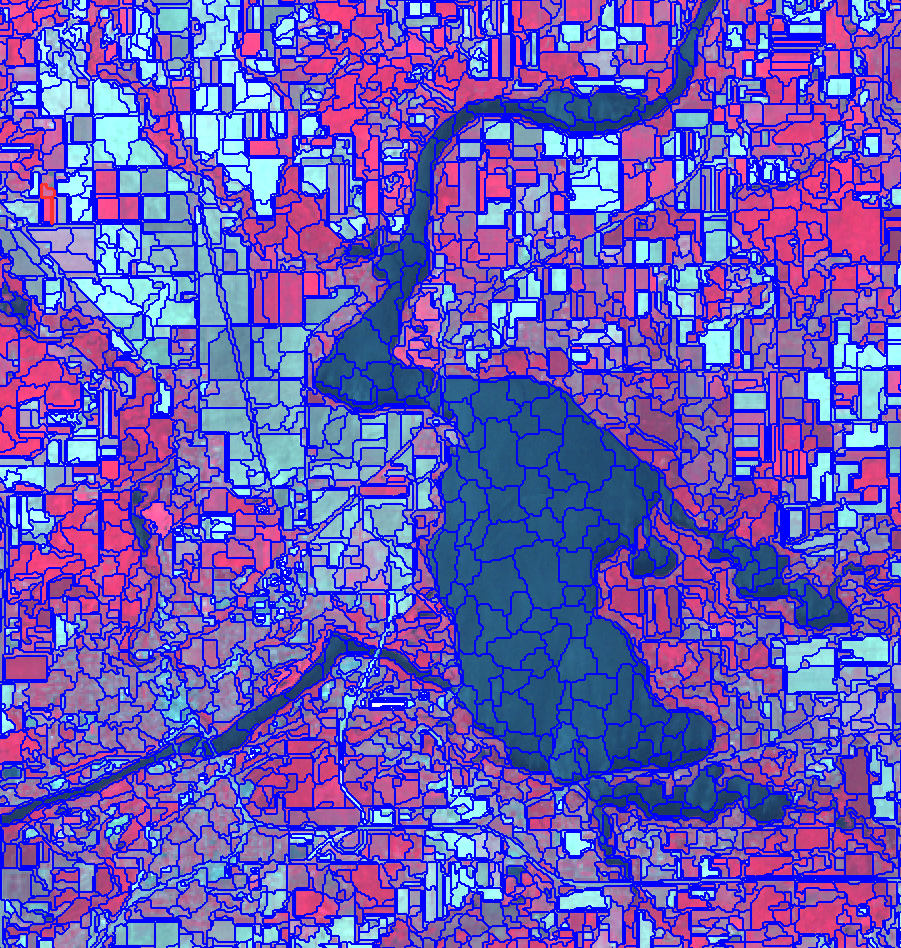
The
multiresolution segmentation process was executed to segment the image (Figure 5).
 |
| Figure 5: Segmented image. |
Once, the image was segmented, the next step was to generate a classification scheme and select training samples based on that classification scheme.
 |
| Figure 6: Classification hierarchy/scheme. |
 |
| Figure 7: Selecting training samples, the objects that are being used to train the classifier are highlighted in the color they represent in the classification scheme. |
A sufficient amount of training samples with varying spectral signatures was necessary to properly train the classifier, the following guideline was used:
 |
| Table 1: Minimum amount of required training samples for each class. |
Part III: Implementing Object Classification
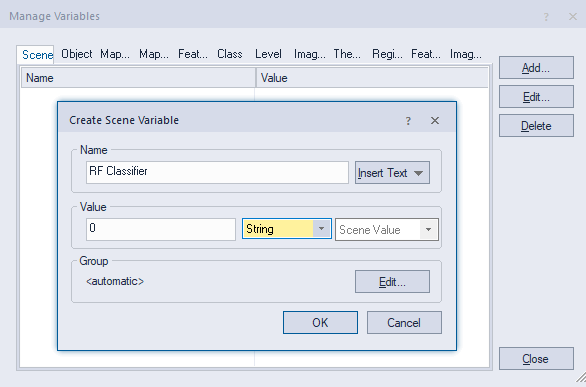
Once the training samples were collected, they needed to be put to use. The first step in this process was to create the classifier variable. This was done by selecting
Process>Manage Variable in the banner of eCognition. A new variable was added, given a name of "RF Classifier" and "string" data type. The variable was then created and the
Manage Variables window was exited.
 |
| Figure 8: Create new scene variable. |
Next, a few more processes were added to the process tree which sought to train and apply the classifier based on the samples collected in the last part of this lab. First, a new process was appended to the process tree, just below the segmentation process. This was given a name of "RF Classification"-- a similar name to the variable created in Figure 8. A child was inserted below this process and given a name of "Train RF Classifier", and another child was inserted within the previous process (Figure 9).
 |
| Figure 9: Train Classifier process. |
The process shown in Figure 9 is what gives functionality to the trainer. The features that were selected included:
 |
| Figure 10: Select features. |
Then, another child was inserted into the
RF Classification process to apply the RF Classification after the classifier was trained.
 |
| Figure 11: Train classifier to apply RF Classification. |
With all processes for object-based classification done, the process tree was executed to classify the image. See
Results for initial classified image. Of course, the initial classification was not perfect and required some


No comments:
Post a Comment